
Free Shipping
On All Orders
On All Orders

by Ying Li
Thank you on your first order with us and we are excited for your Leather Sewing experience! With this new DIY Kits, you can make your next creation in only a few hours and learn new techniques. This is a great kit to improve your ability, focus on a long project and work on your patience. It's great for beginners as it takes you from the very beginning to the end.
Ready to start? Watch our Artist's video tutorial and share your completed work with your friends or families. Or, chance to win gift cards and vouchers if you tag us @clickandcraft on social media!
As a teenager, she ended up working as an apprentice in a neighboring leather craft studio and found that she loved the material and the challenge of creating new things, often incorporating found objects into his leather creations.She began selling her leather craft at various music and art fairs around the country. She found that she had an enthusiastic audience for his leather creations
Ying began following the Sherwood Studio during those years, as a spectator, but always thought that one day he would like to be a participant as it was such a great show of high quality creative work.
No. You can view any Class you purchase as many times as you want, whenever you want – and you’ll never lose access
No. Any tutorial you buy will be accessible to you always. You can view your tutorial whenever you want
We also highly recommend using the latest version of Firefox, Safari, Chrome, or Edge as your Internet Browser. The recommended screen resolution is 1024 x 768 or larger.
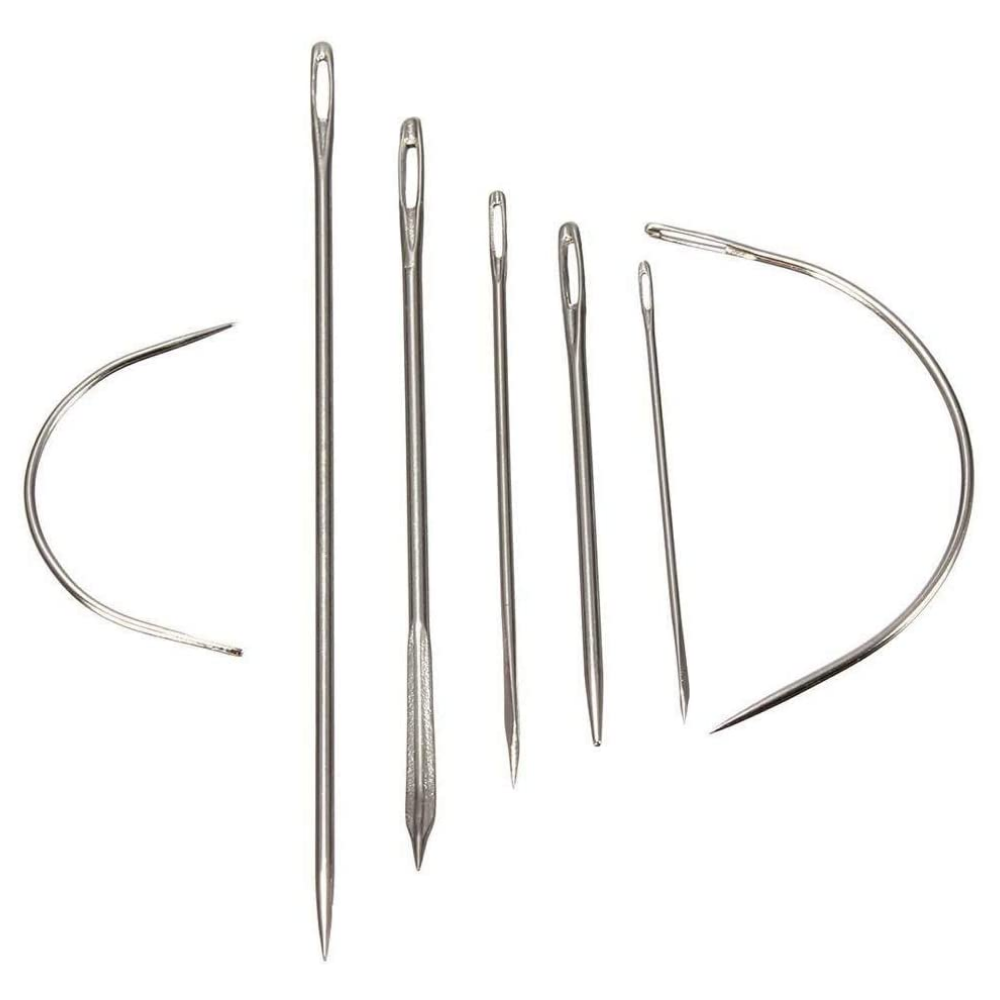
- Replace your regular needle with a leather needle
- A heavy-duty needle with a special tip that’s made to easily pierce leather.
- Don’t be surprised if you break a needle while sewing thick areas, so be sure to have extras on hand
- Pins should never be used in leather, as they’ll leave a permanent hole
- Instead, hold pieces in place before sewing by taping them together with double-sided tape
- We prefer the double-sided tape that comes in a dispenser like the one above
- Simply apply a line of tape between the two pieces of leather you want to sew, placing the tape along the edge of your leather, within what will be the seam allowance
- Then sew your seam, and the tape will remain inside the seam allowance (no need to try to remove it)
- Believe it or not, this is a standard leather construction method, and if you could peek inside the seams of commercially-made leather goods, you would likely find tape or glue in the seam allowances

- Never use cotton thread when sewing leather, as the tanins in the leather will erode the thread over time
- Instead, use polyester or nylon.
- You may want to use heavy-duty top-stitching thread
- It’s not necessary, but leather does look nice when stitched with heavier thread

- Use a longer-than-normal stitch when sewing leather; we use about a 3.5
- You can use any stitch length in the general range of longer than a normal stitch but shorter than a basting stitch

- When sewing with leather, be sure that you use a very sharp pair of scissors
- This will make your cuts precise and will in turn create a more professional piece.
